
Wondering how to convert a web app into a DApp? What are the steps in the DApp development process? How to make a DApp website?
We have the answer for you here!
DApps (decentralized applications) offer several advantages over traditional centralized database applications. Aside from these advantages, innovating in DApps is a great way to further help the quest to unlock the power of blockchain technology.
In this article
- Web into DApp Conversion
- An Example Project to Turn a Web App Into Dapp
- Frequently Asked Questions on Converting a Web App Into a DApp
Let's explore how to undertake a web to DApp conversion.
Web into DApp Conversion in 3 Steps
Take the following 3 steps to convert a web app into a DApp:
1. Build DApp development capabilities
Since you already have your web app, I assume you already have UI/UX and testing skills on your team. You need to build Ethereum development capabilities, including DApp development and coding smart contracts.
I recommend the following learning resources for your team:
- Ethereum Development Tutorials;
- An online Solidity course offered by Blockgeeks because you will code smart contracts using Solidity, i.e., Ethereum‘s proprietary language.
- DApps For Beginners website provides valuable guidelines for developing DApps.
If you want to take advantage of hiring dedicated developers with years of proven experience for your web into DApp conversion project, you can contact DevTeam.Space. It's a vetted community of expert developers who have quite a few successful blockchain projects in their portfolio.
2. Install MetaMask

A DApp is a web app that stores the server-database logic on a blockchain. Smart contracts communicate with the blockchain to store data that the DApp creates and uses.
You need to use MetaMask, i.e., a tool that enables you to communicate with the blockchain through smart contracts. It allows you to run your DApp in your browser even if you aren‘t running a full Ethereum node.
It‘s a browser extension. Download it from the MetaMask website, where you get Chrome or Firefox extensions. After you have installed the extension, a little icon will appear at the top of your browser.
Click the icon, accept their terms & conditions, and create your password. You will need to save your 12-word private seed because you will use it later. At this point, you are connected to the Ethereum mainnet, i.e., the main network.
For your development purposes, you need to change this and instead connect to a test blockchain. There are two kinds of public Ethereum testnets, i.e., test networks available, as follows:
- Lightweight Ethereum nodes that you can use for small-scale local testnets. An example is ethereumjs-testrpc. It's good to develop and test smart contracts at an early stage.
- Heavyweight Ethereum nodes that you use for testing smart contracts at a later stage. An example is Sepolia Testnet.
To deploy and run smart contracts on the Ethereum mainnet, you need to spend real Ether. However, that‘s impractical when you are just learning how to develop smart contracts, hence these testnet options are very useful.
In Sepolia, there is no real value of Ether, so you don‘t spend any real money. As you might expect, security is also not up to the mark, but that‘s not a real concern when you are just learning to develop smart contracts.
In your MetaMask, change your connection to Sepolia by clicking on the mainnet icon. This completes your MetaMask setup.
3. Use Remix IDE
I recommend that you use the Remix integrated development environment (IDE) for your smart contract development. It‘s the easiest option for a beginner Solidity programmer.
You can access it on the Remix IDE website. Remix itself is a DApp, hence web-based, so you don‘t need to install anything.
It provides a code editor for you to write your smart contract. The console shows you the response from the blockchain when you execute your smart contracts.
The run section allows you to deploy your smart contracts and interact with them. A smart contract executes automatically. The code and execution results are visible in the blockchain.
It provides a nice debugging option where you can step through the code. This is a great help, especially for beginners. Use it to compile your code to the point that you resolve all compilation errors.
Back to Top
An Example Project to Turn a Web App Into a Dapp
In this guide, I will use an example web app for the DApp conversion project undertaken by Merunas Grincalaitis. He converted his LinkedIn-like app, where you can create an account, follow and unfollow others, and write small messages, into a DApp.
Find the app here and code here.
The app has no server since it's for demonstration purposes only. In a real application of this kind, the following functionalities would require a server:
- To store accounts and messages, including any actions taken;
- To save information about whom you are following.
The app uses JavaScript files for the other functionality and executes them in the browser. When you convert it into a DApp, you will need to store the following on a blockchain:
- Accounts with profile and bio information;
- The count of followers that a user has.
- Messages with content, creator information, and timestamp.
Note: We will use this information later while creating smart contracts.
Throughout this guide, I will refer to his article for code snippets and commands, so let‘s call it the ’reference article. ‘
Smart contract variables for decentralizing your web app
You will now start coding your smart contracts, and for that, you need to define your variable first. To do this, you use a special type of variable called ’Struct‘. It allows you to create new types of variables with their own properties.
Using ’Struct‘, you create the following two variables with their respective internal properties:
- ’User': It will have a name, occupation, and bio.
- ’Message‘: This has message content, creator, and timestamp.
Create the variable in Remix IDE.
Smart contract functions to port a web app to a DApp
You should have details of the 3 sets of information that your DApp will store on the blockchain, and now you will create functions for each. Create them as follows:
Function to store an account with a profile and bio
Set the profile of a user by using the setProfile function. It sets the name, occupation, and bio values. For this, it processes the following information from memory:
- Users' name:
- Users‘ occupation;
- Users‘ bio.
The mapping of the user will normally link the user's address by default with the user information. This function is to override it.
Note the difference with your web app, where you may have used an API call to a Node.js server, for example, and stored the information in a database. In the case of a DApp, the logic is contained in the smart contract.
Check out the reference article for the corresponding code.
Function to write a message and store relevant information
Use the writeMessage function to store a message in the database. It will take the content of the message from the message memory.
Then, it creates a temporary message Struct instance. This will have the message content, the sender's address, and the current timestamp. The keyword "now," which is in the format of a timestamp with ten numbers, is used here.
The function then adds the message to the array of messages of the corresponding user. It also adds it to the array of all messages. Follow the reference article to read the code.
Function to store follow and unfollow information
Use the followUser function to take a follow address, which it will add to the users' mapping of follows.
The unfollowUser function executes a loop. It looks into a list of all followers of a user and matches the address of the user requesting the unfollow action. It then removes the second user from the list of the first user's followers.
Solidity is quite like C++ or Java, and the loop works in a manner similar to those languages. You can get further guidance by reading the code in the reference article.
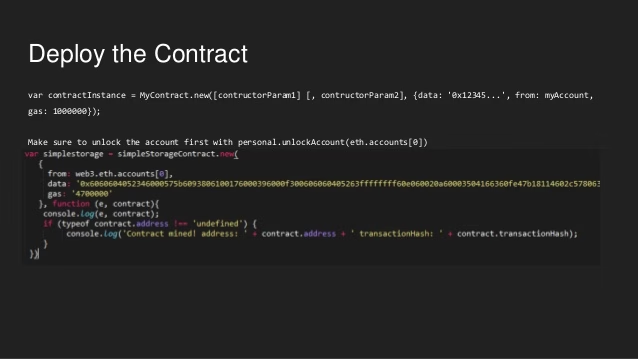
Deploy smart contracts in the Ethereum testnet
Now that you have coded your smart contracts, you need to deploy them in the Sepolia Ethereum testnet. However, in the same way that you need real Ether to deploy smart contracts on the Ethereum mainnet, you need to test Sepolia Ether in this case.
Visit MetaMask Ether Faucet and request 1 Ether.
MetaMask had injected Web3 into your browser, and you need to use it. You have already connected your MetaMask account to Sepolia. Ensure that you are still connected.
Now, go back to the Remix IDE and click ’Create‘. It‘s the small ’+‘ sign at the top left of your browser. You need to confirm this transaction in MetaMask.
Connect smart contracts to the web app using Web3.js
Now that you have deployed your smart contracts, the next step is to connect them to your web app. You need to use the JavaScript library called ’Web3.js‘.
Open your web app in your favorite IDE, navigate to the folder, and create an empty file. Name it ’web3.min.js‘. You will copy and paste the web3 min code into this file in the project directory.
Visit the Web3.js GitHub repository, and copy the web3 min code from the web3.min.js folder. Select the complete code, copy and paste it into your empty web3.min.js file, and save your file. Import your populated web3.min.js file into your main HTML file.
You also have the option of installing Web3 with Node.js, and the instructions are in the reference article.
Initialize your smart contracts
The next step in this tutorial is to initialize your smart contracts, and you need to have the contract application library interface (ABI) and contract address. ABIs are data encoding schemes in Ethereum to communicate with smart contracts. Read more about ABIs in this web3j documentation.
Do the following to get the contract ABI:
- Go to the Remix IDE and click the compile tab. Scroll down, and you will find the ABI section. Click the small button next to the heading “ABI” and copy it to your clipboard.
- However, you can‘t use the copied information as is. ABIs are JSON or JavaScript Object Notation documents. There are spaces inside that you can‘t have. Hence, you need to clean it up, and you can use this ’JSON minify‘ tool for this. Paste the ABI on the screen of that tool and click the “JSON Minify” button.
- Copy the output text. Paste it in a variable called ’const contractABI‘ in your code.
Take the following steps to get the contract address:
- Go back to the Remix IDE and click the run tab. You will find the contract address below.
- Copy it and paste it into a variable called ’const contractAddress‘.
You need to create a contract instance, where you will use the contractABI and the contractAddress variable you just set up. The next step is to open the JavaScript file of your web app for a function. You need to update it with the contract instance code for that function.
Repeat the process for all functions. See the reference article for detailed coding instructions. Your project of converting a web application to a decentralized application is now complete.
Planning to Decentralize Your Web App?
Your real-life web applications might have far more functionalities than the one in this example. Hence, you will likely need to code many more smart contracts, possibly with higher complexity, to convert your web app into a DApp.
While your cost will vary depending on the manpower rates in your part of the world, the total project cost will ultimately depend on the complexity of your existing web app.
Ethereum DApp development and coding smart contracts are niche skills, and skilled blockchain developers are typically overbooked. You will also need project managers with blockchain development as well as relevant industry experience, and that‘s a hard combination to find.
If you are unable to find the right developers, consider getting professional help to turn your app into a decentralized web app.
DevTeam.Space can help you here with a community of expert blockchain developers. Write to us your initial DApp development requirements via this quick form, and we will get back to you instantly for further assistance. DevTeam.Space is an American software development company with a 99% project success rate. DevTeam.Space delivers software projects, mobile applications, websites, and complex financial, banking, healthcare, construction, and education software solutions on time and within budget.
Back to Top
Frequently Asked Questions Web App Into a DApp conversion
DApp stands for Decentralized Application, which runs on a decentralized blockchain network of computers where no one entity controls the majority of crypto tokens. DApps utilize blockchain networks such as the Ethereum network. While the front-end code can be in any language, its back-end code must comprise smart contracts. The app must use a crypto token created using a standard cryptographic algorithm, e.g.,’ proof of work‘ (POW).
It is possible to convert a web application to a DApp, provided that you have the right developers to do it for you. The process will involve some considerable changes to the web application, so you should ensure that you have developers who are experienced in blockchain technology.
A smart contract is just a piece of code. It uses "IF-THEN-ELSE" conditions and allows the execution of legal-like functions. For example, a smart contract can transfer crypto tokens from one blockchain address to another based on certain conditions. The conditions are coded in the smart contract. Ethereum smart contracts run on an Ethereum virtual machine that runs on each computer node.
Back to Top
Related articles
Learn more about developing DApps (decentralized apps) from our expert articles:
- How to turn a Website into an App: 5 Approaches
- How to Undertake Ethereum Development for Blockchain?
- What are the Benefits, Uses, and Challenges of DApps?
- How to Deploy a Contract on Ethereum?
- How to Conduct Ethereum App Development?
- What to Plan for Blockchain Software Development?
- How to Interview and Hire Blockchain Developers
- What are the Benefits, Uses, and Challenges of DApps?
- How to Make Decentralized Apps
- How to Scale Ethereum Dapps
- How to Build DApp Games Like CryptoKitties?